Creating tables
To insert a table using the Table button
-
Press Table .
.
A grid appears.
-
Move the pointer over the grid to select the number of columns and rows that you want in the table.
Note
The cells of the grid correspond to the cells of your table.
Tip
The grid displays eight rows and eight columns by default. You can add rows by moving the pointer past the bottom row. Similarly, you can add columns by moving the pointer past the right row.
If you’re using a mouse, click and hold the left mouse button while moving the pointer.
-
Press the screen or click your mouse.
The table appears on the page.
To insert a table using the Insert Table dialog box
-
Select .
The Insert Table dialog box appears.
-
Type the number of rows and columns in the boxes.
-
Optionally, select Make cells square to make the table cells square.
-
Optionally, select Remember dimensions for new tables to use the current table dimensions for all future tables that you create in SMART Notebook software.
-
Press OK.
The table appears on the page.
To draw a table
-
Press Pens .
.
The Pens tool buttons appear.

-
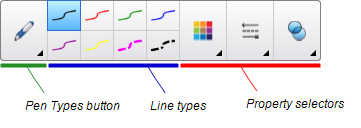
Press Pen Types, and then select Pen or Calligraphic Pen.
-
Select a line type.
-
Draw a table on the screen.
Tip
Make the lines of the table as straight as possible and connect the corners.
-
Press Select .
.
-
Select your drawing.
-
Press the menu arrow, and then select .
If SMART Notebook software recognizes your drawing as a table, it removes your drawing and adds a table to the page.
 .
. .
.
 .
.