
|
Education Software 2013 |
You can create a group of objects, which lets you interact with all grouped items at the same time. After you create a group, you can select, move, rotate or resize the group as if it were an individual object. However, if you want to interact with an individual object in a group, you must ungroup the objects first.
Grouping objects manually
You can group and ungroup objects manually using the menu or the shake gesture.
Using the menu
To group objects
To ungroup objects
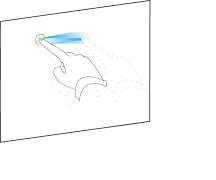
Using the shake gesture
Notes
-
You’re unable to use the shake gesture with a mouse.
-
The shake gesture works only when you initially contact your interactive product’s surface.
To group objects
To ungroup objects
Grouping objects automatically
If you write or draw multiple lines, SMART Notebook software automatically combines the lines into a single object. For example, if you write the letters of a word, SMART Notebook software combines the individual letters, enabling you to interact with the whole word. If you want to write words on the same line but don’t want them combined, leave a large gap between them, use different pens, or briefly put the pen in the pen tray before writing another word (interactive whiteboards only).
If SMART Notebook software combined lines that you want to manipulate individually, ungroup the lines as described above.