 SMART education software for Windows operating systems
SMART education software for Windows operating systems
SMART education software for Windows operating systems
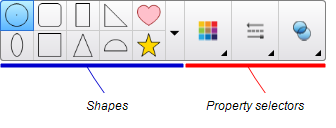
You can use the Shapes tool to create a variety of shapes, including perfect circles, perfect squares, perfect triangles, other geometric shapes, hearts, check marks and Xs.
You can add a shape to your page, and then edit its properties. Alternatively, you can customize a shape’s outline color, fill color and line thickness, and then add it to your page.


 To create a shape
 .
.
 and then select a shape.